Red Team: How to embed Golang tools in C#
Last night I was working on some private tools. The story began when I presented a tool to my mentor Vincent Yiu in Golang (“Of course, not built by me”), and he was like, “Yeah, this is great, but how do we use it during our Red Team engagements. Do I upload this to the target machine?”. The short answer to the question was “Yes” at that time, but it leads to a journey in which I wanted to run the Golang tool from C#. I searched online a found tons of old tutorials, but none of them provided a full explanation. Then I moved to my ultimate source of knowledge, “BloodHound Slack.” With my limited knowledge gathered from those old posts, I posted some queries there. A few Golang enthusiasts such as “Awgh”, “lesnuages”, and “C_Sto” helped me to achieve my final binary.
Without further due, lets dive into how I achieved this. I will use a sample Go binary to demonstrate the concepts.
My Environment
OS: Windows 10 Arch: amd64 Target: One Single C# binary embedding the Golang binary
Requirements
1. Golang
2. TDM-GCC
3. Visual Studio 2019 Community
How to do it
Step 1: Make a GoLang DLL
Let’s take a template Golang source
Once the source code is saved on disk, compile it using the following command
You will see main.h and main.dll in the Go source folder.
Step 2: Make a C# wrapper
Open Visual Studio 2019 and create a C# console application. Then right-click on the solution and click “Manage Nugets for this Solution.” Install Fody and Costura.Fody Nugets. Once the Nugets are installed right-click on the solution click Add Item->XML and rename the XML to FodyWeavers.xml. Add the following lines to it.
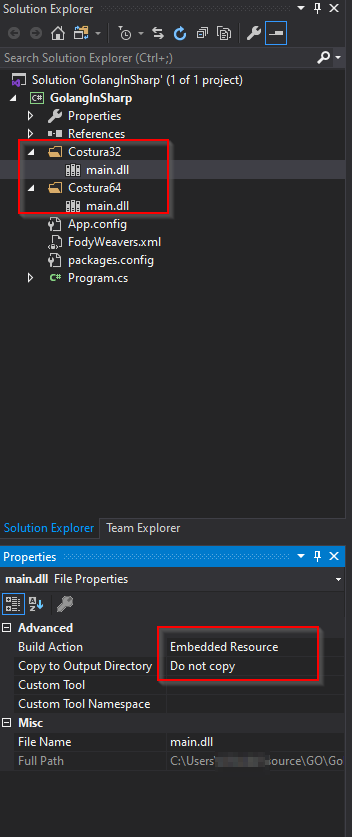
Next step is to make the proper folder structure and add the compiled DLL
.
Add Costura32 and Costura64 folders and add main.dll to the folders. Make sure to change the Build Action.
Next step is to call this DLL inside the C#. See the following source code
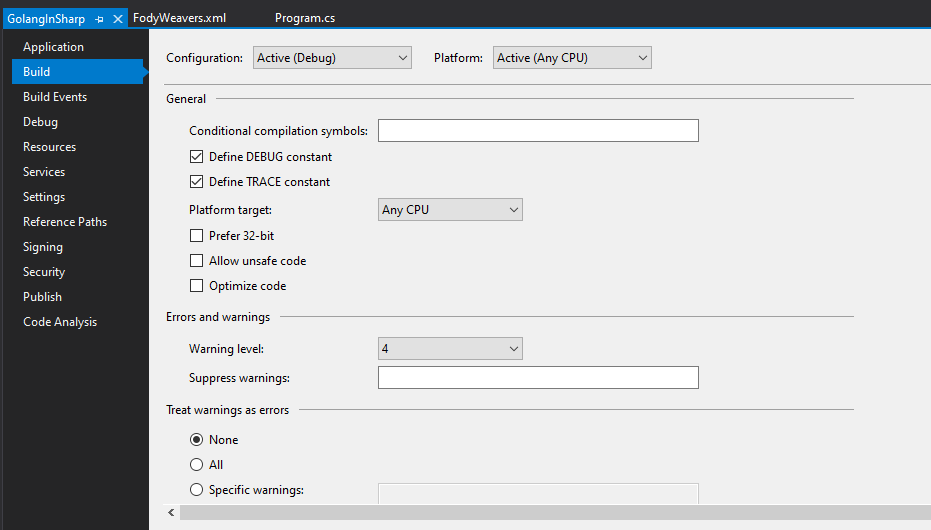
Compile the Console application and you should be good to go. Make sure your project properties are as following

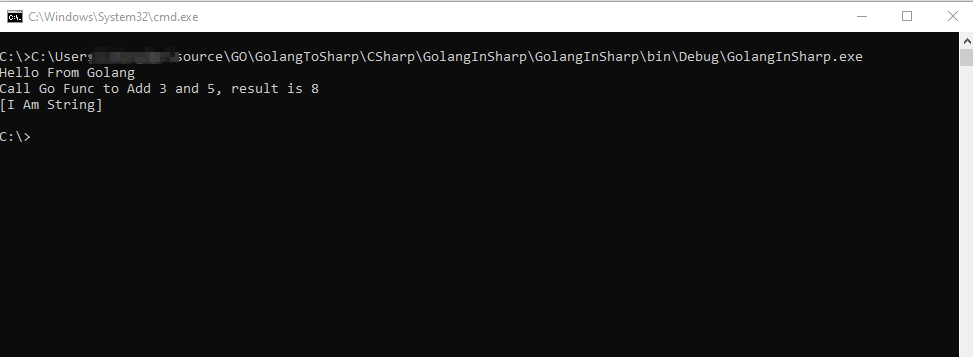
Final Result is

I have uploaded the above project on github (https://github.com/shantanu561993/GolanginCsharp). You can download the project as a template and use it for your projects.
Thanks Everyone who helped me in this endeavor. Thanks everyone who have helped me directly or indirectly. For more updates you can follow me on twitter at https://twitter.com/shantanukhande
#RedTeam
Last updated